
How to deposit data
Once you have prepared your data deposit and logged in, you can proceed to deposit your dataset.
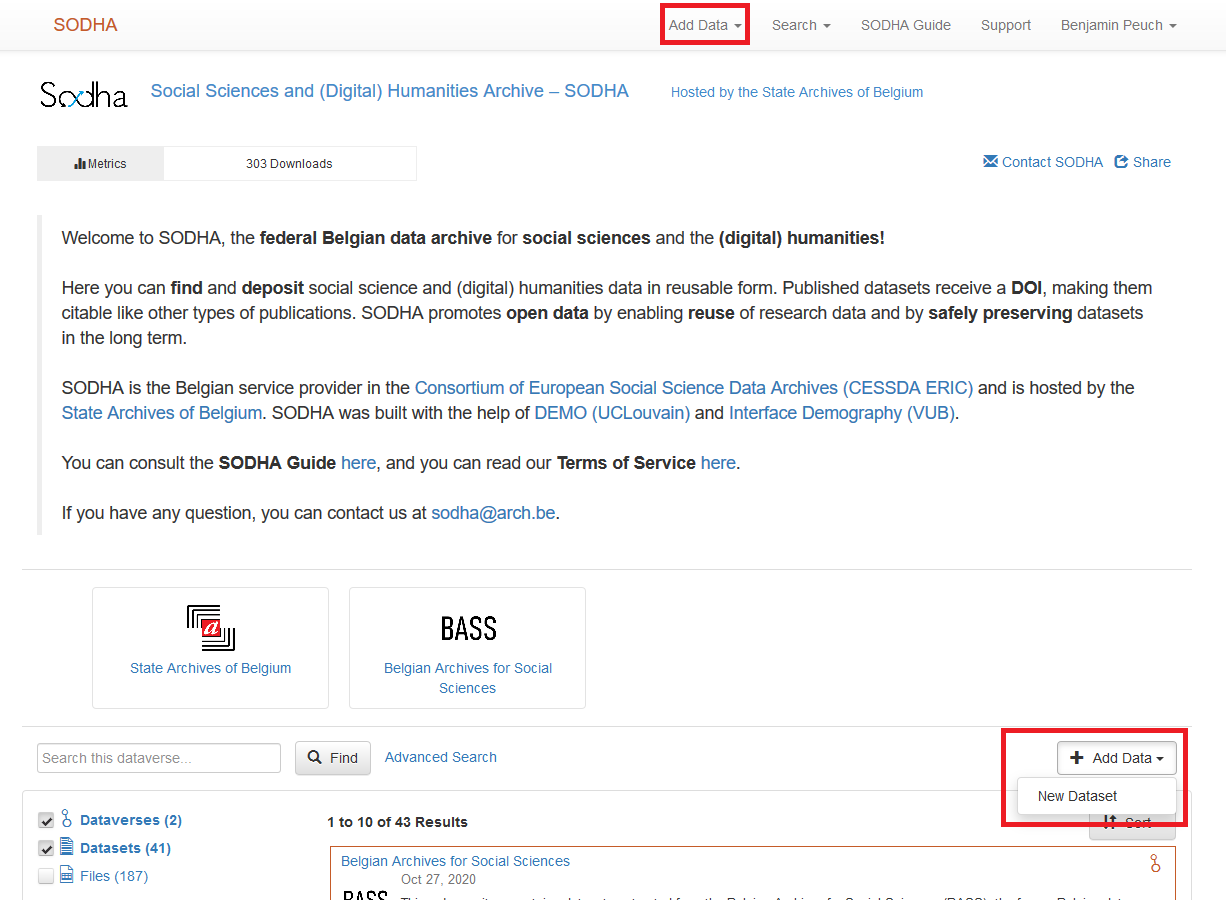
Click on either of the two Add Data buttons on the homepage and then on New Dataset:
Document your data (step 1)
Once you click on New Dataset, you will be asked to provide information (metadata) about the data that you want to deposit.
Fields with an asterisk (*) must be filled in before you can proceed with the deposit.
|
Tip As explained on the page Access and reuse, SODHA recommends three licenses to depositors. By default, SODHA recommends the CC-BY license, which prepopulates the Terms of Use field with the logo of the CC-BY license and a link to the text of this license on the Creative Commons website. 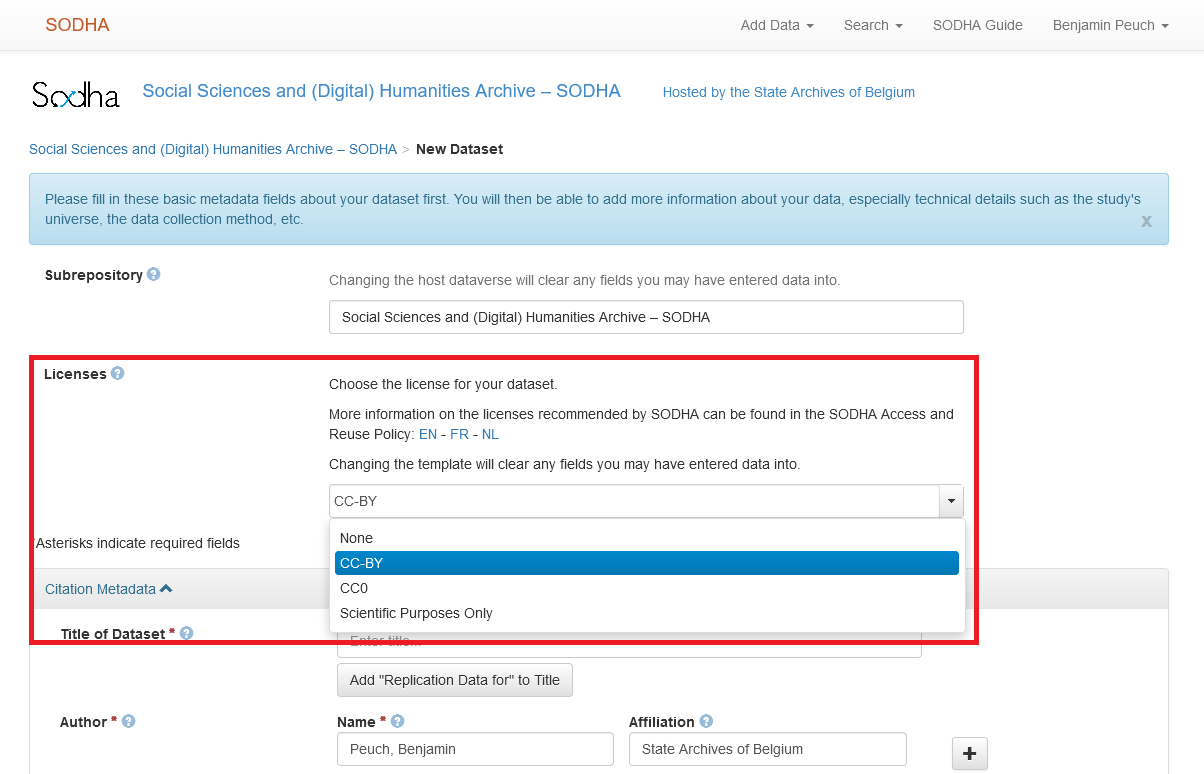
The CC-BY license lets other researchers reuse your data on a large scale while ensuring that you are credited for your work by means of citation. If you want to select another license, you can do so by displaying the dropdown menu of the Dataset Template field. You can use the SODHA Checklist for Sharing Your Data to determine which license is best suited to your needs. If none of the licenses recommended by SODHA satisfies your needs, we recommend that you contact us to discuss what terms of use best apply to your data. |
If you don’t understand the label of certain metadata elements, don’t hesitate to hover over the infobubble for those elements. You will be shown an infobubble with a definition of the element:
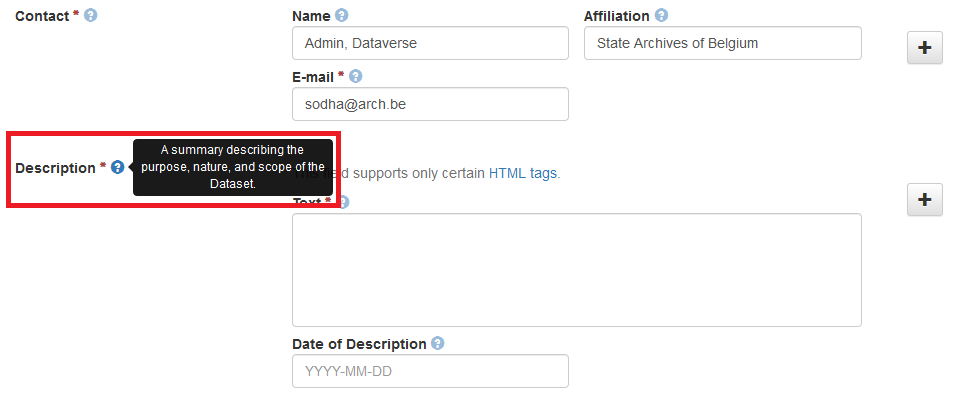
You can also consult our Metadata and Terms Guide if you need additional clarifications.
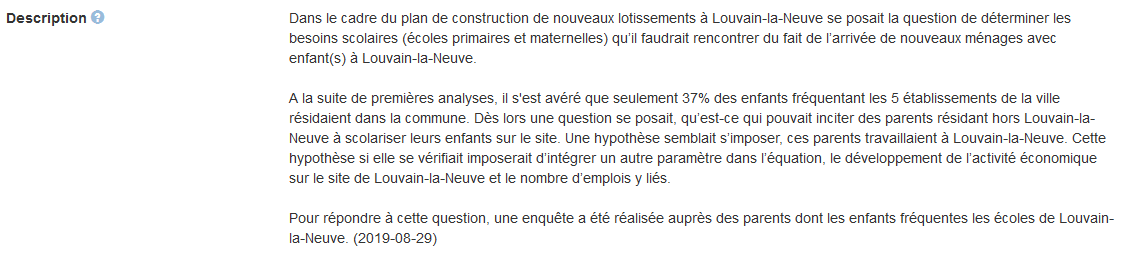
Please note that, for fields such as Description, linebreaks cannot be added to the text with the Enter key: they must be encoded with the HTML tag <br>. Here is an example of a text where paragraphs are separated by encoding the tag and the result it produces:

You can also display the titles of works (for exemple in the Related Publication field) in italics by using the <i></i> tags. If you encode them like this:

The text will appear in italics:

Although the two metadata elements Number of Variables and Target Sample Size / Number of Units are not mandatory, they are very helpful to researchers looking for reusable datasets in social sciences. If they are applicable to your data, please consider providing this information.
Add data files
|
Tip As stated in the SODHA Dataset Publishing Policy [ DE – EN – FR – NL ], when data cannot be deposited, SODHA nevertheless accepts (and encourages) the creation of metadata records on its platform, if only to let other researchers know that such data exist (and might hopefully be accessible at some point in the future). In other words, while SODHA promotes publication of data in open access, depositors are welcomed to document their data on the Dataverse platform even if they cannot publish the data files. Therefore, this step is not mandatory. |
At the bottom of the Add Data > New Dataset page, you have the possibility of adding files to your dataset. You can upload data files but also documentation such as codebooks, lists of questions, computer code, as well as secondary sources like publications, reports, presentations…
You can find the list of recommended file formats here: DE – EN – FR – NL
|
Tip If you want to make sure that the file transfer happened without problems, or if you were informed that errors occurred during the ingest, see this section of the FAQ. |
If you want to limit access to one or more files, check the corresponding box(es), click on Edit and select Restrict:
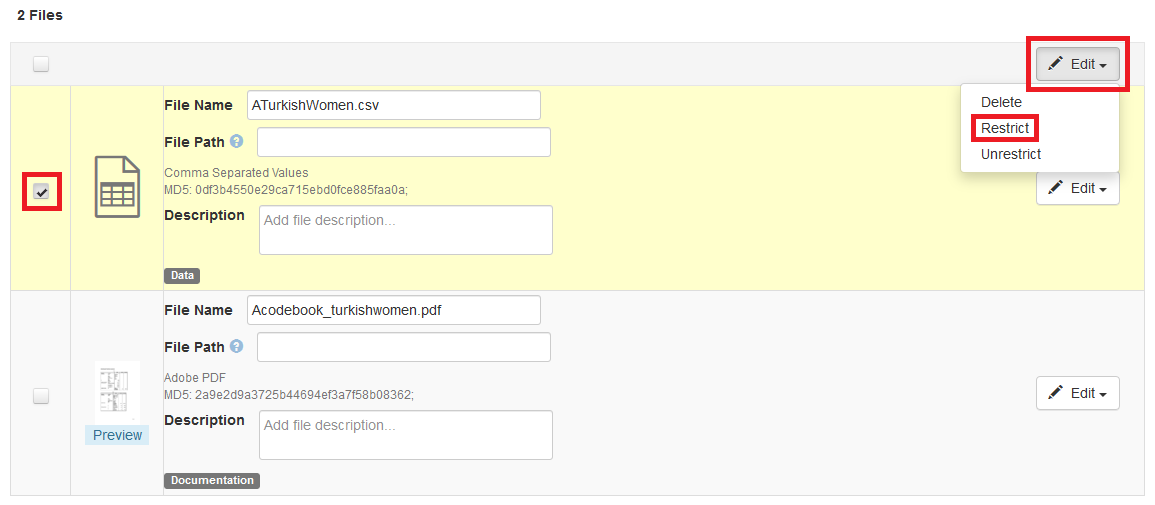
You will then be the only authorized user who can download the files.
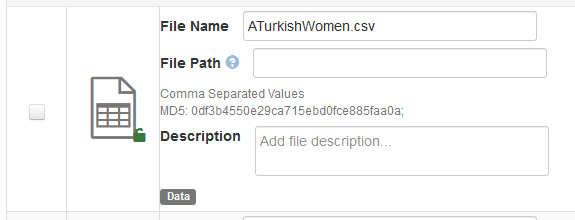
The padlock icon indicates that the file cannot be downloaded. For the depositor, it appears in green and open because depositors can download their own files. To other users, it will appear closed and in red:

|
Warning! Some information can still be derived from a tabular data file with restricted access by the use of the Export Metadata button on a dataset’s record page: 
When converting dataset documentation into the Data Documentation Initiative (DDI) metadata standard, Dataverse automatically generates summary statistical information which comprises variable labels (the first row of a tabular file), the highest and the lowest value for each column, standard deviation, etc. |
Once you have filled in the metadata fields and added files, click on Save Changes. A Draft and Unpublished version of your dataset will then be created in Dataverse. This version of your dataset is not yet accessible online, and you are free to further document it as much as necessary before you decide request its publication.
Document your data (step 2): Extra metadata
Now that you deposited a Draft version of your dataset, you can add more detailed metadata. Go to the Metadata tab of your dataset record and click on Add + Edit Metadata:
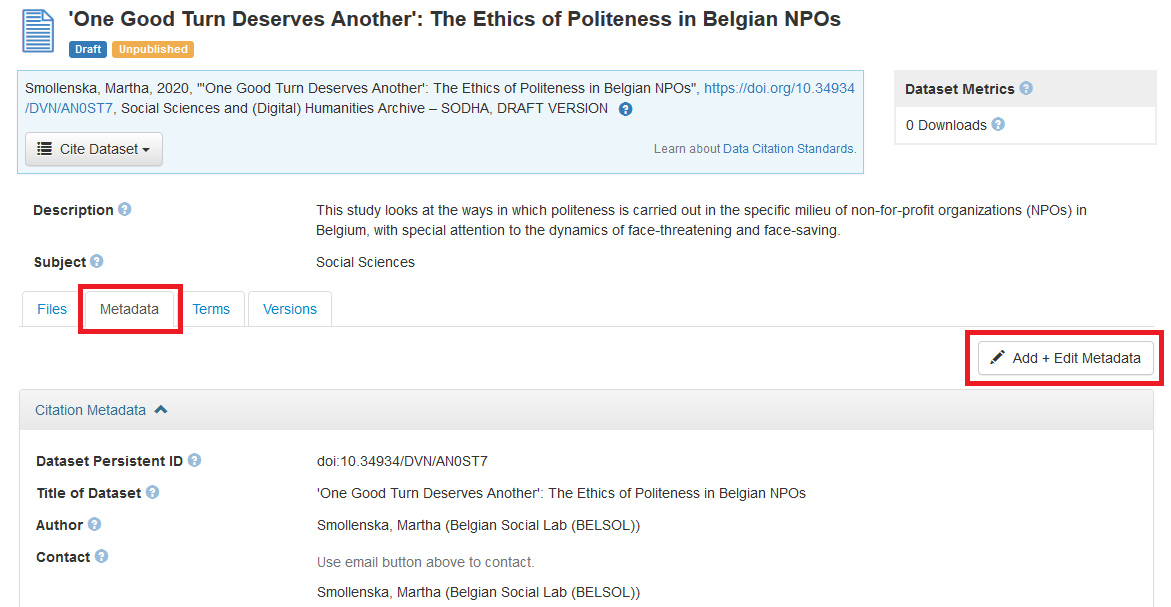
You now have access to new metadata elements. In Citation Metadata, you can now specify among other things:
- An Alternative URL for the dataset, in case copies of the data are available in another repository or if the data are stored elsewhere entirely;
- Topic Classification terms, which have a broader scope than Keywords;
|
Tip The Vocabulary and Vocabulary URL subfields of the Topic Classification field are prepopulated with references to the CESSDA Topic Classification. Because SODHA is the Belgian CESSDA service provider, we recommend that you use this controlled vocabulary. |
- The Kind of Data that can be found in your dataset (hover over the field’s infobubble for examples of kinds of data).
You can now also add Geospatial Metadata regarding the geographic coverage of your data as well as Social Sciences and Humanities Metadata.
Finally, you can add Historical Metadata if, for example, the dataset that you deposited was produced a long time ago or if it comes from another repository.
|
Tip As long as your dataset is in Draft and Unpublished form, you can change it — by changing, adding or removing metadata or terms, by adding, updating or removing data files — as much as you want before you submit it for review. Take as much time as you need before committing your dataset for publication. |
Document your data (step 3): Terms
Go to the Terms tab of your dataset record and click on Edit Terms Requirements:
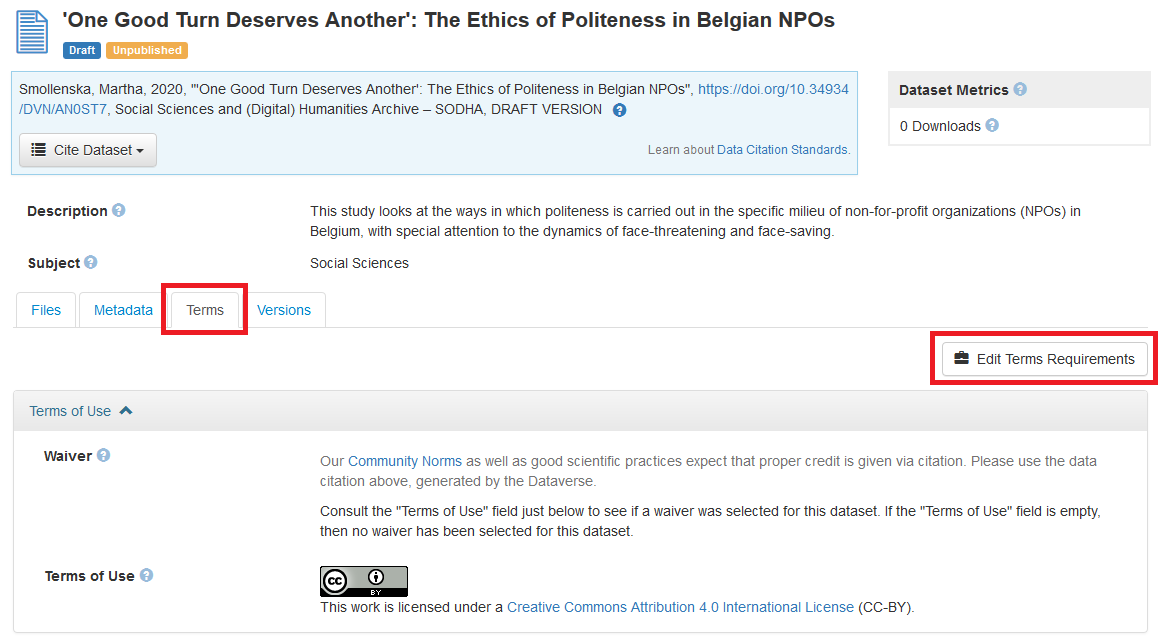
You can now add more information about the access and reuse conditions for your dataset.
|
Tip The Terms of Use field is prepopulated according to which license you selected at the beginning of the deposit procedure. |
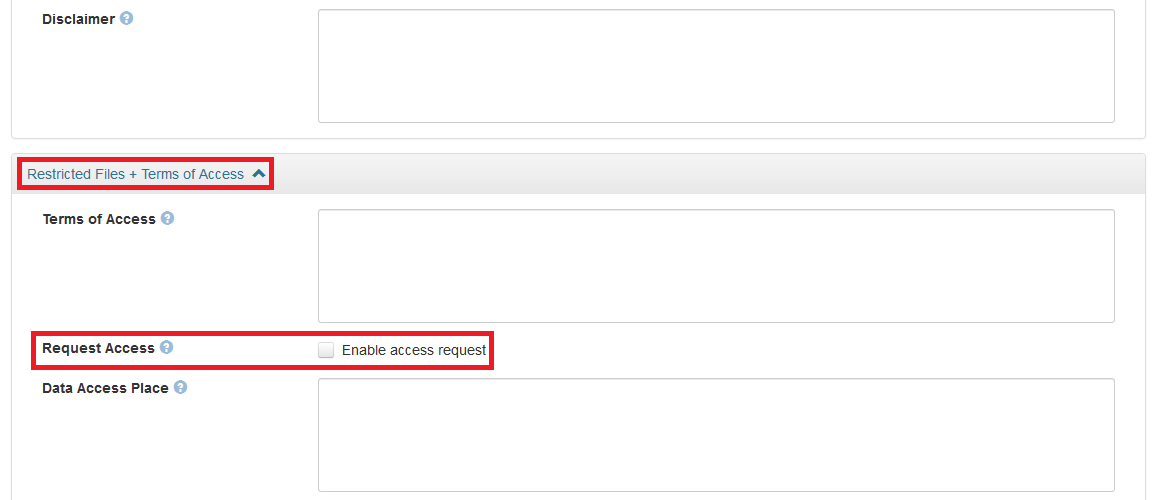
If you restricted access to one or more of your dataset’s files but you want to allow users to request access, go to the Restricted Files + Terms of Access section and check the box Enable access request:
Regarding embargos, please note that, as specified in the SODHA Access and Reuse Policy [ DE – EN – FR – NL ], embargos can last no longer than 1 (one) year. See this section of our FAQ for more practical information.
Submit your dataset for review
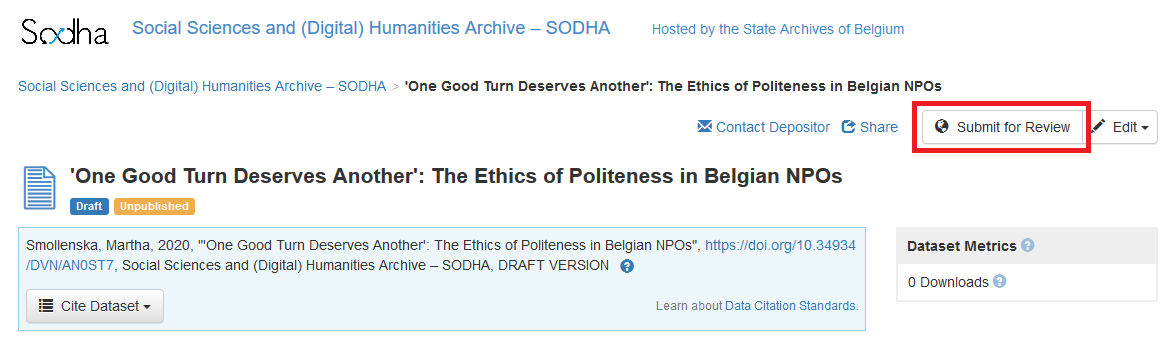
Now that you have fully documented your data, you can ask a SODHA admin to publish it by clicking on Submit for Review:
|
Warning! Once you have submitted your dataset for review, you will no longer be able to modify it until an administrator has reviewed your dataset. |
The SODHA team will be notified that you requested review of your dataset for publication. An administrator will then review your dataset against the SODHA Dataset Publishing Policy [ DE – EN – FR – NL ].
If your dataset is found to be compliant, the administrator will publish it and the system will inform you of this both with an email and a notification on the website:
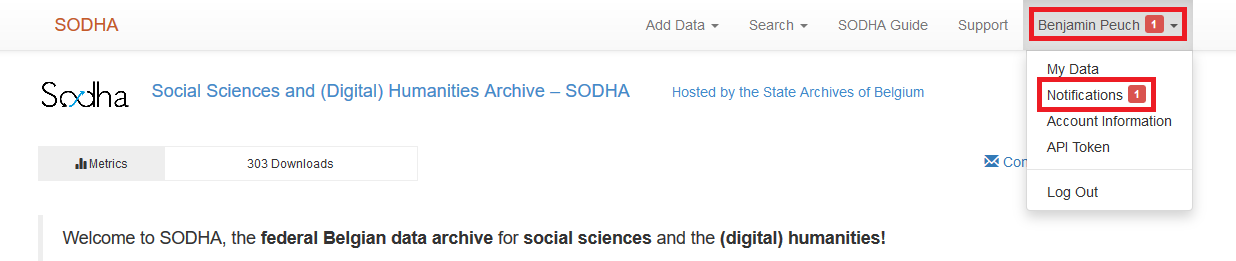
Your dataset will then receive a DOI and become accessible online.
Manage requests for access
If you choose to restrict access to parts or all of your dataset, please note that, as depositor, you will be responsible for managing requests for access. See the dedicated page on How to grant access for more information.